KickStart – C# Custom Configuration

This post will provide an example and explanation of how to create custom configuration for C# applications. I will discuss ConfigurationSections, ConfigurationElements, ConfigurationElementCollection. Also I will discuss how to nest these items together. My plan is to take very small steps; implementing each part of the configuration individually.

By the end of the post we will be able to navigate a custom configuration similar to the following config file:

Assumption

  • Good understanding of C#
  • Good understanding Visual Studio – I’m will be using VS 2012
  • .NET 3.5 and higher
  • Basic understanding of configuration files

The application we are going to create is quite contrived. The school settings that we will store in the config file would usually be stored in a database, but I want to provide a domain that most people understand.

Our Domain

A School has
A Name
A Address
Zero or More Courses
A Course has
A Title
An Optional Instructor
Zero or More Students
A Student has
A StudentId

We are going to create a Windows Console application. All it’s going to do is display values from the config file. When we are completed with the application it will display something similar to this:

Continue reading

Posted in C#, Tutorial, Visual Studio | Tagged | 14 Comments

Kick-Start: Bower – A Simple Tutorial of Setting-Up and Using Bower.JS

The goal of this post is to provide a simple description of how to install Bower JS and how to use Bower JS to manage client side dependencies. The first time I tried to use Bower I had problems. Hopefully this tutorial will provide others a complete resource to navigate around the issues that I found.

Assumptions:

  • You are a Windows developer
  • You will use the Windows Command Prompt instead of Bash
  • You have little or no knowledge of Node.js
  • You have little or no knowledge of GIT

1. Download and install Node.js

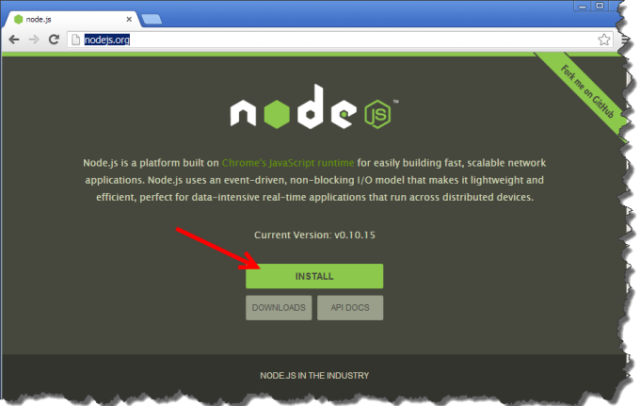
To run Bower you will need to download and install Node.js. Go to http://nodejs.org/ website and select the “install” button (see image below). This should download the version of Node.js you need. For me, when I clicked the “install” the version for Windows 64-bit downloaded. Once Node.js is download, execute the file.

I will not go thought the steps for installing Node.js; it’s very straight forward. During the install I used all default options.

Continue reading

Posted in JavaScript | Tagged , | 22 Comments

Understanding AngularJS – Simple Example

I did a similar post as this post for Backbone.js Understanding Backbone.js – Simple Example. Based on readers’ comments the backbone.js post seemed to assist many people. My goal with this post is to help others understand the core parts of AngularJS and how they work together.

The AngularJS application that we are building will display a list of movies and will have the ability to add movies. We could create this application with very minimum code, but extensibility and maintainability will be limited. My primary objective is to show how to structure an AngularJS application that provides a base of knowledge to create other AngularJS applications extensible and maintainable.

My target audience will have some knowledge about AngularJS, but are having a difficult time implementing all but the most basic applications. By simple, I mean you should only have to focus on AngularJS. We will not be using jQuery, Twitter Bootstrap, or other 3rd party libraries.

We could create this application with just a controller and a view. But in this post I will describe the following core AngularJS features:

  • Routes
  • Modules
  • Views
  • Controllers
  • Services

Above I mentioned I will keep this post simple, but we do need a web server. The AngularJS Theater application will load views and data (json files) from the server. I would like to do these examples by access “file:///E:/TempProjects/Theater/index.html#/” on local computer, but most browsers cannot access these files on local computer do to Cross Origin issues. Here a StackOverflow question and answer that describes this issue: Cross origin requests are only supported for HTTP but it’s not cross-domain. So we need a web server. Any web server will do, such as IIS, Node.js and Express or other server. In this example I will be using Node.js and Express. You will not need to know anything about Node.js; all that is need is for you to install Node.js and to execute a script that I will provide. I will step you through the complete process to get Node.js and Express up and running.

Google Chome will be the browser I use, but any current browser should work fine. The reason I pick Chome is for its development tools. I will be developing in JetBrains WebStorm IDE, but any IDE or text editor should be fine.

This post will be based on a contrived idea of displaying a list of movies at a theater. There is nothing fancy here.

The complete solution can be downloaded from here:
Source – Understand-AngularJS-Simple Example(Theater)

Based on comments from Hasan this example works with AngularJS 1.1.5. It does not work with AngularJS 1.2.3.

Continue reading

Posted in AngularJS, C#, JavaScript, Tutorial | Tagged , , | 34 Comments

How I Navigated to AngularJS

This article is about the process I’ve gone through of selecting AngularjS as my MV* JavaScript framework of choice. I will discuss the evolution I went through from learning jQuery, Knockout, Backbone.js, and eventually settling on AngularJS.

I’ve been programming in JavaScript since the late 90′s. JavaScript is not going anywhere. JavaScript is very popular today, and I believe it will only get more popular. For programming a browser, JavaScript is the least common denominator. This is the only language that all Browsers support. But, JavaScript has many pitfalls; just read the book JavaScript: The Good Parts by Douglas Crockford. In the early years, I used JavaScript mostly for validation and simple DOM manipulation. Writing different code for each browser sucked. Back in the early years JavaScript seemed like a toy, there weren’t many best practices and the expectations of what could be accomplished with JavaScript was limited.
Continue reading

Posted in AngularJS, Backbone.js, JavaScript, Uncategorized | Tagged , , , , | 4 Comments

Setting-up AngularJS, Angular Seed, Node.js and Karma

I’ve used AngularJS for a few months, but I have no knowledge when it comes to testing AngularJS apps. I have a subscription to PluralSight.com and wanted to go through their online video training course for AngularJS. Specifically with this course I want to learn how to use Karma to do testing.

I’m usually extremely happy with PluralSight.com course, but in the beginning of this course I was somewhat disappointed. In Section 7 (“Angular Seed”) new technologies were introduced. The author introduced Angular-Seed, Node.js and Karma. I’ve worked with Node.js, but there are probably many people who have never used it. I believe the author took for granted that the student knew Node.js. For those who have never used Node.js this could be an obstacle.

When I started the course I didn’t have Node.js installed. I installed Node.js and things didn’t work as intended. I couldn’t run tests in Node.js because Karma was not installed. Once I installed Karma, Chrome wouldn’t launch in the tests.

With all the issues I was having, I wondered if others were having the same problems. If others were having similar issues, were they discouraged and not continuing with the course. So I decided to create this blog post to help others to get stared with AngularJS, Angular-Seed, Node.js and Karma.

Here are my assumptions:

  • You are a windows developer
  • Google Chrome browser is installed
  • You will use the Windows Command Prompt instead of Bash
  • You have little or no knowledge of Node.js
  • You have little or no knowledge of Karma
  • You will use Node.js as the web server. I will step you through this.
  • You have access to and IDE. Visual Studio will be fine. NotePad++ would also probably work. I use JetBrains WebStorm. JetBrains has a free 30 day trial for WebStorm.

Here are the high level step we will follow:

  1. Download and install Angular-Seed
  2. Download and install JetBrains WebStorm (Optional)
  3. Download and install Node.js
  4. Confirm Node.js is installed
  5. Run Karma Unit Tests – will fail because Karma is not installed
  6. Install Karma
  7. Run Karma Unit Tests again – Will fail because Chrome will not start
  8. Add System Variable to Windows
  9. Confirm System Variable Were Added
  10. Run Unit Tests again – should succeed
  11. Confirm that Units are being tracked by Karma
  12. Start Web Server by using Node.js

Continue reading

Posted in AngularJS, JavaScript, Tutorial, Uncategorized | Tagged , , , | 74 Comments

PC Application, Tools, Utilities and Configuration

I’ve been meaning to do this for a good while.   I have a tendency to rebuild my PC every once in a while, and its seems I can never remember all the thing that I have downloaded,  installed, and configured.  So I will use this as a living log of the software, tools and configuration that I believe are beneficial to me.

Configuration

Tools

  • paint.net– Is a free image and photo editing software for Windows
  • Notepad++– Is a free source code editor and Notepad replacement that supports several languages.
  • Gizmo– Is an free tool that mounts DVD ISOs and has other cool stuff
  • VirtualCloneDrive – Is a free tool that mounts CD/DVD iso files. Not bloated with other features.
  • System Information for Windows – Is an free advanced System Information for Windows tool that gathers detailed information about your system properties and settings and displays it in an extremely comprehensible manner.
  • Disk2vhd – This tool allows you to create a snapshot of your current environment and store it as a VHD.  I use this to back-up environments.  After the VHD is created I can then attached the file as a drive.
  • Actual Multiple Monitors – Provides taskbars on each monitor.  There is a free version and a pro (paid) verson.  The free verision does not expire and provides the features I need.  Update:  I liked this product so much, I decided to purchase it.
  • Snag It – This is a great tool for screen capture.
  • FreeFileSync – FreeFileSync is a folder comparison and synchronization tool providing highly optimized performance and usability without a needlessly complex user interface.

SQL Server

  • SSMS Tools – Is an free add-in for Microsoft SQL Server Management Studio (SSMS) 2005, 2008, 2008 R2, 2011 (Denali) CTP1 and their respective Express versions.
    It contains a few upgrades to the SSMS IDE that I thought were missing.
  • PoorMansTSqlFormatter – This is a plugin for NotePad++. It does very simple formatting for SQL scripts. It’s nothing great but it works.

Software Development

  • Fiddler– Is a free Web Debugging Proxy which logs all HTTP(S) traffic between your computer and the Internet. Fiddler allows you to inspect all HTTP(S) traffic, set breakpoints, and “fiddle” with incoming or outgoing data. Fiddler includes a powerful event-based scripting subsystem, and can be extended using any .NET language.
  • LINQPad – This tools does a lot.  If you use LINQ then this tool is a must.  There is a free version, but I liked this tool so much I purchased the Premium version.
  • IIS – Bit Rate Throttling – I’m using this to throttle bandwidth for an IIS website. This allows me to test on my local network how a slow connection would work.

Visual Studio

Posted in Applications, Configuration | Leave a comment

Table Scans and Index Scans affects more than the table they access

SQL Server only queries data in memory (data cache). If the data needed is not cached, SQL Server will retrieve the data from disk and load it to data cache, and then SQL Server will use the data from the cache.

I have a general guide line that Table Scans and Index Scans are bad. This may not be an issue for small tables, but for large tables scans can cause significant performance issues. For example, if a query accesses a table that is 20 GB in size and a scan occurs, then there is a good chance that all data for that entity will be loaded in memory. If this data is not in memory, then SQL must fetch the data from disk and load it into memory. Fetching data from disk is usually an expensive IO process. If there is not enough available space in the data cache, SQL Server will remove (flush) data from the cache to make room for data that was retrieved from disk.

Data that is used often and cached can be removed from the cache due to poor queries or the lack of an index. Here’s a contrived example. We have 2 tables. The 1st table is Orders and it contains 10 million records and requires 3 GB of disk space. The Orders table is extremely important and is used in most queries and queries that access this table must return very quickly. The 2nd table TaskLog; contains 200 million records and requires 7 GB of disk space. For simplicity, neither table has any non-cluster indexes.

Let’s presume that the server has 8 GB memory. If all queries are executed on the Orders table, eventually most of the data from the Orders table would be in the data cache. There would be little need for SQL to access the disk. Queries would execute fairly fast.

Now, UserA queries the TaskLog table. The query gets counts of TaskType(see example query below). When the user executes this query a table scan is used. Since the data is not in memory, SQL Server will transfer the data from disk to memory. The problem is that there is not enough memory to contain both the Orders and TaskLog table. Since there’s not enough memory SQL Server will flush Orders data from memory and replace it with data with the TaskLog data.

SELECT Count(TaskType)
FROM TaskLog
GROUP BY TaskLog

Now the issue is that any queries that need to access Ordres will be retrieve from disk. This will incur a penalty in performance.

There are many options to solve this problem; indexes could be created on both the Orders and TaskLog table, more memory could be added, and there are probably other options.

But how do you identify if memory allocation is a problem. Below is a query that retrieves space used by all Cluster Indexes and Non-Cluster Indexes. It will show the size of the entity on disk and how much of the entity is in memory.

SELECT
    PhysicalSize.TableName
   ,PhysicalSize.IndexName
   ,PhysicalSize.Index_MB
   ,BufferSize.Buffer_MB
   ,CASE
       WHEN Index_MB != 0 AND Buffer_MB != 0 THEN
            CAST(Buffer_MB AS Float) / CAST(Index_MB AS Float)
       ELSE 0
    END IndexInBuffer_Percent
FROM
(
    SELECT
        OBJECT_NAME(i.OBJECT_ID) AS TableName,
        i.name AS IndexName,
        i.index_id AS IndexID,
        SUM(a.used_pages) / 128 AS 'Index_MB'
    FROM sys.indexes AS i
    JOIN sys.partitions AS p ON
        p.OBJECT_ID = i.OBJECT_ID
        AND p.index_id = i.index_id
    JOIN sys.allocation_units AS a ON
        a.container_id = p.partition_id
    GROUP BY i.OBJECT_ID,i.index_id,i.name
) PhysicalSize
LEFT JOIN
(
    SELECT
        obj.[name] TableName,
        i.[name] IndexName,
        obj.[index_id] IndexID,
        i.[type_desc],
        count_BIG(*)AS Buffered_Page_Count ,
        count_BIG(*) /128 as Buffer_MB --8192 / (1024 * 1024)
    FROM sys.dm_os_buffer_descriptors AS bd
    INNER JOIN
    (
        SELECT object_name(object_id) AS name
            ,index_id ,allocation_unit_id, object_id
        FROM sys.allocation_units AS au
        INNER JOIN sys.partitions AS p ON
            au.container_id = p.hobt_id
            AND (au.type = 1 OR au.type = 3 OR au.type = 2)
    ) AS obj ON
        bd.allocation_unit_id = obj.allocation_unit_id
    LEFT JOIN sys.indexes i on
        i.object_id = obj.object_id
        AND i.index_id = obj.index_id
    WHERE database_id = db_id()
    GROUP BY obj.name, obj.index_id , i.[name],i.[type_desc]
) BufferSize ON
    PhysicalSize.TableName = BufferSize.TableName
    AND PhysicalSize.IndexID = BufferSize.IndexID
ORDER BY Buffer_MB DESC

Here sample result from the query (names have been changed to protect the innocent)

Table Name Index Name Index MB Buffer MB Index In Buffer Percent
Table1 PK_Table1 211875 20586 10%
Table2 PK_Table2 3711 3348 90%
Table3 PK_Table3 27689 2246 8%
Table4 IX_Table4_A 52181 1675 3%
Table5 PK_Table5 278409 1436 1%
Table4 IX_Table4_B 28585 1418 5%
Table2 IX_Table2_A 725 745 103%
Table6 PK_Table6 572 572 100%
Table3 IX_Table3_A 15701 493 3%
Table3 IX_Table3_B 17756 467 3%
Table7 PK_Table7 461 461 100%

Table2 is equivalent to our Orders table in the example. It’s very important that results from this table are returned fairly fast. As we can see 90% of data for PK_Table2 is stored in memory; this is good.

PK_Table1 is 211 GB and 20 GB are in memory. For this example speed in retrieving data from this table isn’t that important and 20GB in memory seems too much. This could be an indication that a scan is being used to access this data, or someone is running a query that they shouldn’t. This provides some good information to further my investigation.

Having one bad query can affect not just the performance of 1 table but the performance of the system as a whole.

Posted in SQL Server, Uncategorized | Tagged , | Leave a comment

How-to deploy application to Windows Azure Compute Emulator with CSRUN

It’s a pain that every time that I want to start a Windows Azure application locally, I must first start Visual Studio and start the debugger. In this post I will describe how to start an application in Windows Azure Compute Emulator without using Visual Studio debugger. This will work for an application that is a Web Role or Worker Role. There are multiple ways to do this, but I believe this may be the simplest.

In this post I will start from the very beginning of creating a new Windows Azure Cloud Service project and creating a default ASP.NET MVC 4 website. If you want to skip all the setup and get to the meat of csrun, then scroll to the bottom of the post.

Things Needed

  • Visual Studio 2012
  • Windows Azure SDK

Let’s get started.
Continue reading

Posted in Uncategorized | 4 Comments

Re-Learning Backbone.js – Require.js (AMD and Shim)

In this post we are going to learn how to use Require.js with Backbone.js and Underscore.js

This post build on the Re-Learning Backbone.js series.

As usual, the examples in this tutorial are extremely simple. We have one goal here and that is to load Underscore.js and Backbone.js using Require.js

We are going to start out with an example that doesn’t function correctly. Don’t worry, I believe it’s important to show you the evolution of creating an application from the very beginning to a working version. We will take very small steps to get where we need to go.

Here are the libraries and their version that we will use in this post:

  • jQuery – version: 1.8.3
  • RequireJS – version: 2.1.2
  • Backbone.js – version: 0.9.9
  • Underscore.js – version 1.4.3

Here’s the source code for the example below: Source

Getting Started

To get started we need a structure for our website such as this:

We also need the following libraries jQuery, Backbone.js, Underscore.js and Require.js. These libraries should be stored in the “libs” directory.

First create two files. The first file will be called Require1.html and this file will be in the root directory. Add the following code to the file.

Here’s the code for Require1.html

<html >
<head>
    <title></title>
</head>
<body>
    <script data-main="scripts/main1" src="scripts/libs/require.js"></script>
</body>
</html>

All the HTML file does is tell RequireJS to execute the main.js file in the script directory.

The second file will be called main1.js and this file will be in the “scripts” directory. Add the following code to the file.

requirejs.config({
    urlArgs: "bust=" + (new Date()).getTime(),  //Remove for prod
    paths: {
        "jquery": "libs/jquery-1.8.3",
        "underscore": "libs/underscore",
        "backbone": "libs/backbone"
    },
});

require(["jquery", "underscore", "backbone"],
    function ($, _, Backbone) {
        console.log("Test output");
        console.log("$: " + typeof $);
        console.log("_: " + typeof _);
        console.log("Backbone: " + typeof Backbone);
    }
);

The main1.js file has two parts, the config method and the require method. The config method is used to setup RequireJs. The config is not mandatory, but it does simplify the code. In the config we included only the “paths” option, but there are many other options available. To see a list of options go to RequireJs Config Options. In the paths option we identify the modules that will be needed. Each module file is in the “scripts/libs” directory. You will notice that each JavaScript file that is referenced does not include the “.js” extension. RequireJS assumes that all files are scripts and the “.js” is not needed. The order of the values in the config paths is not important; the files can be in any order. If we wanted we could have put backbone first.
Continue reading

Posted in Backbone.js, JavaScript, Require.js, Uncategorized | Tagged , | 17 Comments

Browser Script Loading

In this post I will discuss how scripts are loaded and executed by the browser.

It’s common to have scripts loaded by the browser by using the script tag (<script>) with a src (source) attribute. In the old days, the early versions of IE, FireFox, and Chrome, the script tags would load and execute synchronously. Today newer browsers support the ability to download scripts in parallel. The scripts are still executed in order they are declared.

Here’s a list of browser support for asynchronous downloading of scripts:


The previous image is from BrowserScope: http://www.browserscope.org/?category=network&v=2&ua=Chrome%204,Firefox%203.0,Firefox%203.5,Firefox%203.6,IE%206,IE%208,Opera%2010.10,Safari%203.2,Safari%204.0

In the following example we will load 6 scripts (note the script at the bottom). The order of the scripts does matter. Since backbone.js depends on underscore.js, underscore.js will be declared before backbone.js. Here’s the code that will be used to help us understand script loading.
Continue reading

Posted in JavaScript, Uncategorized | Tagged | 1 Comment